博客个性化
更换主题
进入Hexo官方主题网址找到喜欢的主题,打开GitHub根据教程安装主题,或者把整个主题下载下来解压在你的博客目录下的themes文件夹下
下面以next主题为例子
然后修改_config.yml配置文件
theme:next #这里为你下载的主题文件夹名字
然后执行重新渲染部署即可,后文简称三步部署,不再做赘述。
1 | hexo clean |
注:
当你在本地部署后,修改某篇文章或者配置,无需重新清除渲染部署,保存然后刷新本地界面就可看到效果。可节省时间。
配置文件设置
安装 Hexo 和 NexT 后,你可能会发现 Hexo 使用的两个配置文件,它们都称为:_config.yml
- 第一个位于站点根目录下,其中包含 Hexo 的配置。
- 第二个在主题根目录下,由 NexT 提供并包含主题的配置。
themes/next/_config.yml或者node_modules/hexo-theme-next/_config.yml
后文我们称第一个 为Hexo 配置文件,第二个为NexT 配置文件,不在赘述。
备用主题配置
关于如何配置NexT主题?传统方法是编辑 NexT 配置文件。但是,通过 git 或 npm 升级 NexT 主题时,配置文件会被覆盖,这给主题的配置带来了不便。具体可看NexT文档。
请确保您使用的是 Hexo 5.0 或更高版本。
在站点的根目录中创建一个配置文件,例如
_config.next.yml将所需的 NexT 主题选项从 NexT 配置文件复制到此配置文件中。
在所有这些设置上方添加参数。
theme_config:next(你的主题文件夹名)NexT官方文档说的是,把所有配置代码后移,然后再上方加theme_config: 。我实操下来,这样是不行的。渲染后还是老的配置文件生效。所以改为我上面那样写。
网站页面设置
基本设置
在Hexo配置文件找到:
1 | # Site |
具体language的值可查看主题下language文件夹,如zh-HK,zh-TW等。
香港、台湾是我国不可分割的一部分。这里只是为了区分简体和繁体。
布局方案
方案是NexT支持的一项功能,通过使用Scheme,NexT提供不同的视图。几乎所有的配置都可以被这些方案使用。到目前为止,NexT支持4种方案,它们是:
Muse→默认方案,这是NexT的初始版本。使用黑白色调,主要看起来干净。Mist→ Muse的紧凑版本,具有整洁的单列视图。Pisces→双列方案,像邻居的女儿一样新鲜。Gemini→ 看起来像双鱼座,但具有带有阴影的不同列块,以显示对视图更敏感。
可以通过编辑 NexT 配置文件、搜索关键字来更改方案。将看到 4 行方案设置,可以通过删除其中一行并添加到上一个来启用其中一行。
1 | #scheme: Muse |
站点图标
图标存储在\themes\next\source\images下,选择你想要的图标后,在next配置文件下替换即可,此处我为了方便管理新建了favicon文件夹专门存放站点图标,读者根据自行需求更改.
1 | favicon: |
背景图像设置
在themes\next\source\css下创建文件夹\_custom然后在创建style.styl
添加:
1 | body { |
图片放入themes\next\source\images\background,然后在themes\next\source\css\main.styl添加:
1 | @import "_custom/style.styl" |
三步操作部署渲染即可看到效果。
页脚
网站成立年份和作者
在next配置文件找到
1 | footer: |
注释页脚logo
在next配置文件找到
1 | # Powered by Hexo & NexT |
网站运行时间
在themes\next\layout\_partials\footer.njk增加
1 | <div> |
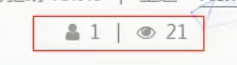
访客量、网站浏览量和文章阅读数
在next配置文件打开busuanzi_count,_icon都为对应的图标,
1 | busuanzi_count: |
同时在这里简单介绍一下:
pv方式,统计单个用户连续点击N篇文章,记录N次访问量。
uv方式,统计单个用户连续点击N篇文章,但只记录1次访问量。
在themes\next\layout\_partials\footer.njk找到下面代码
1 | {%- if theme.busuanzi_count.enable %} |
默认效果:
如果next的默认效果你很满意无需更改,可跳至下一步骤。
取消中间“|”,在 themes\next\source\css\_common\components\post\post-header.styl下找到下面代码,这是页脚的css样式。
1 | // .post-meta-item exists in .post-meta and footer |
因为这个样式多处共用,我们在他的下方写一段清除样式的css代码,然后在上方的页脚处复制class即可。class="post-meta-item clear-post-meta-item"达到清除的效果,详见下文。
1 | .clear-post-meta-item::before{ |
注释掉图标,增加旋转等待特效<i class="fa fa-spinner fa-spin"></i>。当busuanzi_count数据未传送完成时,原先数字位置会出现旋转等待图标。
1 | {%- if theme.busuanzi_count.enable %} |
首页和归档页面文章分页
安装插件
1 | npm install --save hexo-generator-index |
在Hexo配置文件中修改下面代码,使得首页每间隔5篇文章就分页,归档页每间隔10篇文章才分页。
1 | index_generator: |
标题徽章logo
在next配置文件,放入你喜欢的图标即可,注意Mist布局不支持此项。
1 | custom_logo: /uploads/custom-logo.jpg |
深色模式
在next配置文件打开,当用户操作系统为深色模式时网站会自动适配深色模式。
1 | darkmode: true |
书签
书签是一个插件,允许用户保存他们的阅读进度。用户只需单击页面左上角的书签图标(如🔖)即可保存滚动位置。当他们下次访问您的博客时,他们可以自动恢复每个页面的最后一个滚动位置。
您可以通过在 NexT 配置文件中将值设置为来启用它。bookmark.enable``true
1 | bookmark: |
主菜单
在next配置文件中,找到
1 | menu: |
分别对应
1 | menu: |
可以把你不需要的功能注释掉,也可以在对应名字那些修改成你想要的名字。
标签
使用 Hexo 命令新建一个名为 tags 的页面即可,值得一提的是,next的标签是以词云那种形式的,某个标签的文章越多,该标签显示效果越大,蛮有趣的。
1 | hexo new page tags |
该页面标题可以在文件 \hexo\source\tags\index.md 中修改
为文章添加标签
在文章的开头添加如下字段
1 | tags: |
然后在刚才生成的博客目录\source\tags\index.md指定其type为tags
1 | title: 标签 |
执行三步部署就能看到标签效果。
关于
使用 Hexo 命令新建一个名为 about 的页面即可
1 | hexo new page about |
该页面内容在文件
\hexo\source\about\index.md中修改
搜索
通过在站点根目录目录中执行以下命令进行安装:hexo-generator-searchdb
1 | npm install hexo-generator-searchdb |
编辑 Hexo 配置文件并添加以下内容:
1 | search: |
编辑 NexT 配置文件以启用本地搜索:
1 | local_search: |
还可以使用Algolia Search第三方搜索,具体可看官方文档
侧边栏设置
官方文档写的非常详细:NexT 侧边栏设置
代码块
在next配置文件找到:
1 | codeblock: |
可以在此选择你想要的主题风格Highlight (theme-next.js.org)
另外在hexo配置文件,选择打开highlight还是prismjs
1 | highlight: |
背景动画
背景动画使用Js来处理,会JS的同学可以自己写喜欢的动画,我这边就用了网上比较通用的动画。找到以下路径 themes\next\layout\_layout.njk 在文章 </body>的上面添加如下代码
1 | <script type="text/javascript" color="255,255,255" opacity='1' zIndex="-2" count="100" src="//cdn.bootcss.com/canvas-nest.js/1.0.0/canvas-nest.min.js"></script> |
重新部署后,网页出现粒子动画
文章设置
标签图标
默认情况下,帖子底部的标签左侧有一个符号 #。如果你更喜欢图标而不是符号,请编辑 NexT 配置文件,如下所示:
1 | tag_icon: true |
字数统计和阅读时间
安装插件
1 | npm install hexo-word-counter |
在hexo配置文件
1 | symbols_count_time: |
next配置文件
1 | symbols_count_time: |
球体滚动标签云
可以访问我的博客,打开侧边栏查看效果
首先安装插件npm install hexo-tag-cloud,在你想要添加标签云效果的页面加入以下代码,我添加在侧边栏,打开themes\next\layout\_macro\sidebar.njk
1 | {% if site.tags.length > 1 %} |
在hexo配置文件加入
1 | tag_cloud: |
三步部署即可看到效果。
提交博客到搜索引擎
提交到百度
博客验证
访问百度搜索资源平台官网,注册或者登陆百度账号,依次选择 用户中心 –> 站点管理 输入你的网站,协议头推荐是https协议的,如果你没有https协议后面可能会出现报错,因为hexo会强制把你的链接转为https协议
选择文件验证,下载验证文件,放到blog的 source 目录中,如下设置hexo配置文件,防止这个html被 hexo g 命令重新渲染。
1 | # Directory |
然后 hexo clean; hexo g; hexo d ,完成验证。
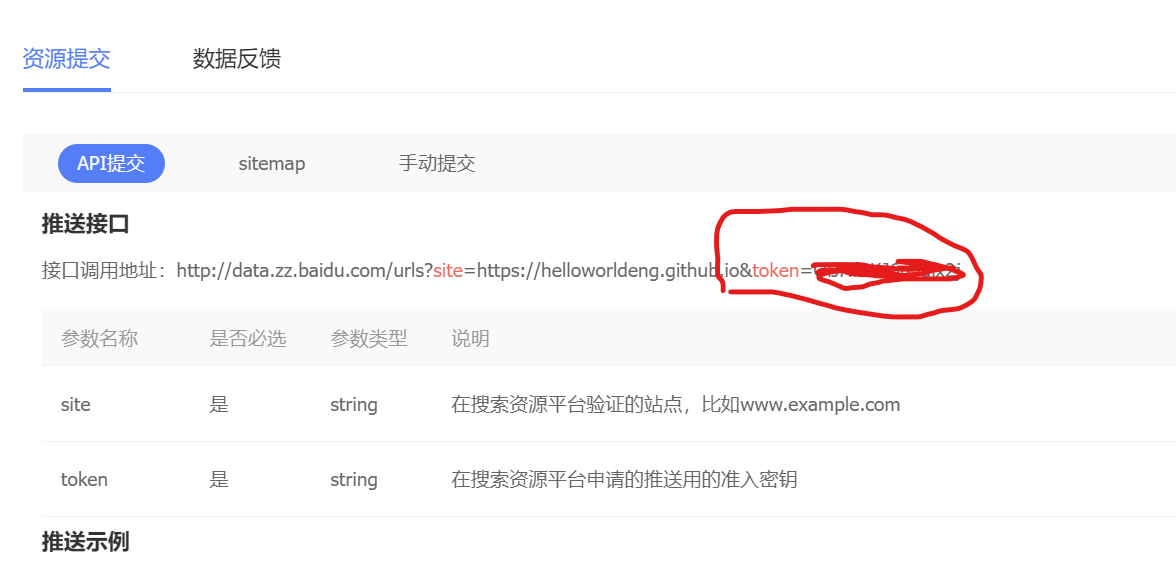
主动提交
安装插件 npm install hexo-baidu-url-submit --save,设置hexo配置文件,
1 | baidu_url_submit: |
token在 普通收录 -> API提交 中能看到
在hexo配置文件加入你的站点、加入新的deploy
1 | # URL |
最后运行 hexo clean; hexo g; hexo d,显示
1 | {"remain":2965,"success":33} |
说明成功推送33个链接,remain是当天剩余可推送的条数
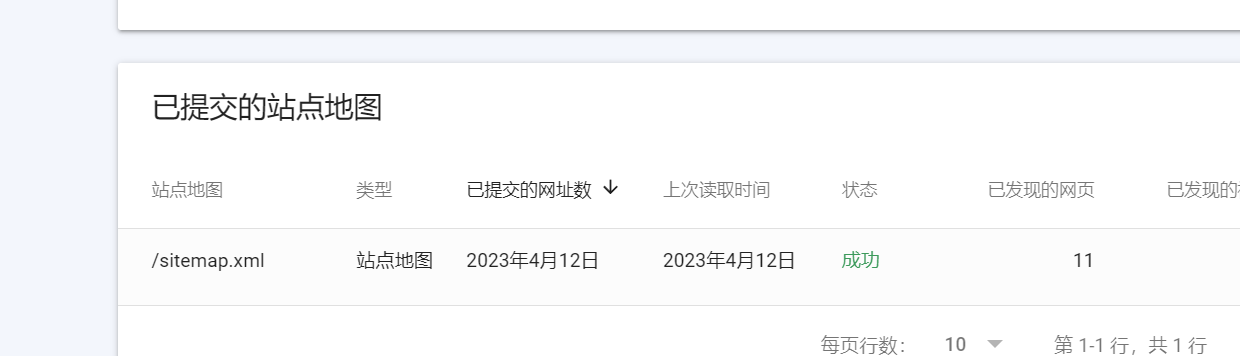
sitemap提交
推荐sitemap提交和主动提交一起部署,先安装一下插件
1 | npm install hexo-generator-sitemap --save |
然后使用命令 hexo clean; hexo g; hexo d 就在首页生成了sitemap.xml文件,其中,sitemap.xml是通用的站点地图,而baidusitemap.xml是百度专用的站点地图。
提交到谷歌、必应
谷歌和必应的步骤相同,这里就一起讲了。进入Google搜索管理后台和bing搜索管理后台。选择网站模式,输入博客域名,next集成了站长工具验证,接下来我们使用其的配置方法。
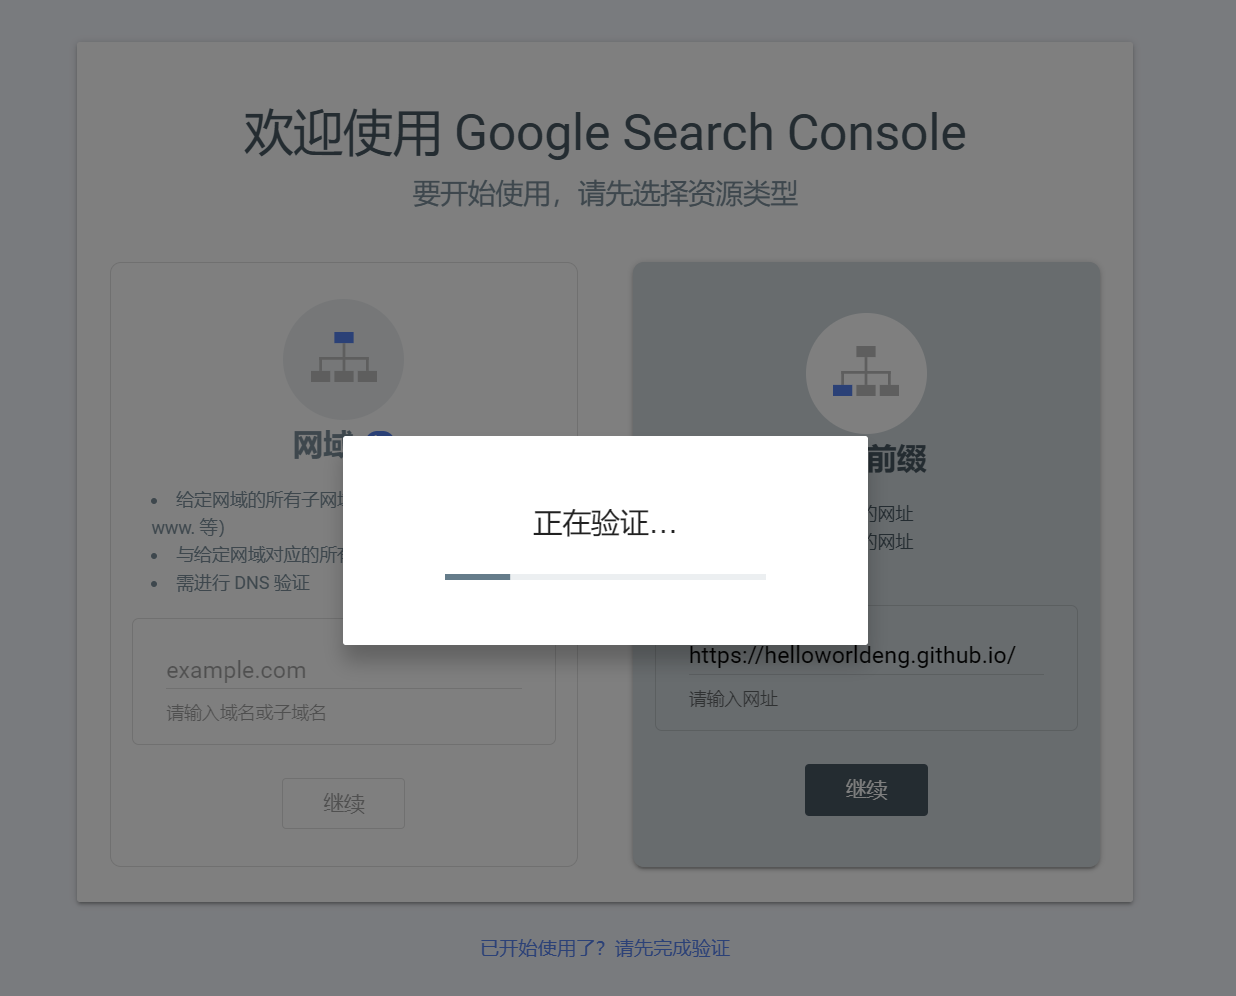
选择HTML验证,你将得到<meta name="google-site-verification" content="xxxxxxxxxx" />,将xxxxxx填入next配置文件中,
1 | google_site_verification: xxxxxxxxxxxxxxxxxxx |
百度验证也可使用这种办法,对应的填入 baidu_site_verification:即可
然后执行hexo clean; hexo g; hexo d在回到站长平台验证即可,验证后提交站点地图。用前文说到的,sitemap.xml文件。
评论系统
next集成了许多评论系统,这里我们选择畅言系统。进入畅言云评,注册你的账号获得密匙。然后填入next配置文件,同时你也可在畅言后台设置一些你的个性化设置,如登录账号限制等等。需要注意:发表评论后,网站需要一些时间才能看到评论数量的增加。

1 | changyan: |